
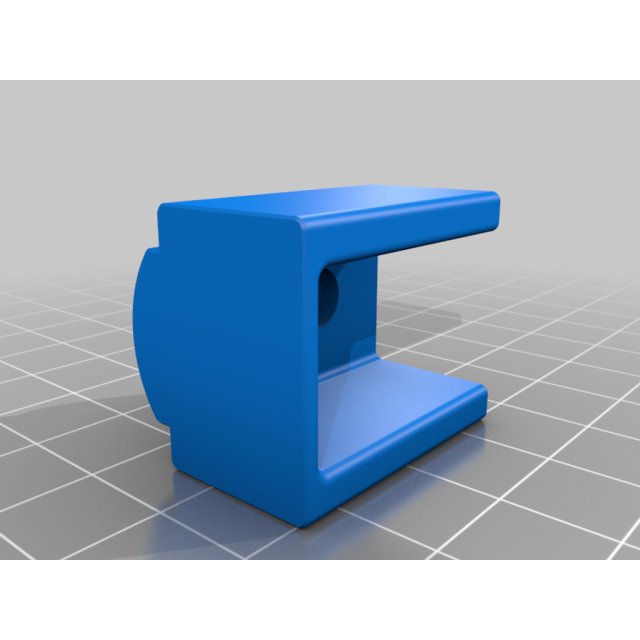
Design by RobsonM · Original design · CC-BY-4.0 · Source details. Indexed via 3DCarParts. Source text and images remain credited to their creators; no modified design files supplied.
Designer source image. It may show an installed part, prototype or render; it is not an Orphaned Parts production sample.
Center Console Light Adapter
Center Console Light Adapter design listed for 2013 Mazda 6. Listed category: lighting. Verify dimensions, fitment and material suitability before printing.
- Make
- Mazda
- Model
- 6
- Year range
- 2013
- Submodel
- Not supplied
- Engine
- Not supplied
Source approval status: pending. Source flags do not certify fit, material suitability or safety for your vehicle.
License conditions, files, application and fit are reviewed before work is accepted.
Description
Parts list:
1x LED 5mm 3V, preferably short one with 100 deg light cone
1x resistor 1k Ohm
2x M3x8mm bolt with locknut
some wire, AWG 20-24 recommended
multimeter
READ WHOLE INSTRUCTION BEFORE STARTING!
To remove the head console unscrew 2 screw hidden in sunglass compartment and pull firmly down holding sunglass compartment door. When clip releases slide whole assembly forward. BE CAREFUL for short wires above! Consult photos.
Using multi-meter measure voltage difference between 2 points marked GND and 12V on photos and make sure it is indeed 12V! BE VERY CAREFUL NOT TO SHORT ANYTHING!
When console is removed gently disconnect both plugs. They are both secured by little ping that need to be pushed inwards to release - see photos, marked by arrows.
Prepare LED assembly. Solder 1k resistor to + of LED, the longer leg (trim excess legs, leave only about 8-10mm on both LED and resistor legs but remeber/mark the + on LED). Solder GND wire to shorter LED leg. Insulate everything including resistor with heatshirk. When done use CA or any other glue to secure LED in printed assembly. Then whole module will just snap in place (it only fits one way, don't force it).
Then use 2 M3 bolts to connect power to the LED from marked locations. To access 12V screw from below you'll have to remove map light lens - see photo for how to. To access GND screw you'll have to remove middle cover - see photos for clips that need a gentle push with flat head screw driver.
With all done always check for any shorts. You can apply 9V battery voltage (use a fuse if possible) to 2 points where LED was connected and test everything (LED, map lights etc).
Be careful, work slowly and gently. Everything comes apart really easy.
Source description, under the recorded CC-BY-4.0 license.
Print instructions
- Layer height: 0.2mm
- Infill: 70%
- Supports: As needed
Settings from the source; not independently tested by Orphaned Parts.
Print price estimates
Planning prices for one print, not a final quote. Defaults use a size allowance inferred from the part name, not a measured or sliced model. Filament suitability must be confirmed.
| Filament | USD / print | Application notes |
|---|---|---|
| PLA | $42.50 | Indoor prototypes; not a default material for hot vehicle interiors. |
| PETG | $43.50 | General-purpose candidate; heat and creep need review. |
| ASA | $50.00 | Candidate for UV exposure; verify temperature and geometry. |
| ABS | $48.00 | Enclosed printing; review application and dimensions. |
| TPU | $60.50 | Flexible designs only; not a substitute for rigid materials. |
| Nylon | $60.00 | Moisture, tolerances and application require review. |
| PA-CF | $69.00 | Filled nylon; abrasive filament and fit need review. |
Pricing assumptions and exclusions
USD: ($6 setup + $3 finishing + filament weight × assumed spool cost × 1.25 waste allowance + print hours × $2.50 × material time factor) ÷ 0.65. Rounded up to the next $0.50.
Assumed spool costs per kg: PLA $25, PETG $30, ASA $40, ABS $30, TPU $45, Nylon $65, PA-CF $95. Time factors: PLA/PETG 1.0, ASA/ABS 1.2, TPU 1.6, Nylon 1.4, PA-CF 1.5. These are proposed shop rates, not measured production costs.
Design work, test fitting, hardware, shipping and tax are additional where needed. Multi-file sets may need several prints. Use actual sliced weight and time when available. Final pricing is confirmed in writing.
All available source data
- Id
- cf540d62-b0e1-48df-9fb6-a9ec215ef150
- Part Name
- Center Console Light Adapter
- Slug
- center-console-light-adapter
- Category
- lighting
- Cswp Approval Status
- pending
- Download Status
- approved
- Make
- Mazda
- Model
- 6
- Year
- 2013
- Year End
- Not supplied
- Submodel
- Not supplied
- Engine
- Not supplied
- Created At
- 2026-05-10T08:26:43.628061+00:00
- Origin
- aggregated
- Source
- thingiverse
- Source Url
- https://www.thingiverse.com/thing:4198704
- Source Creator Url
- https://www.thingiverse.com/RobsonM
- Cc License Code
- CC-BY-4.0
- Cc License Url
- https://creativecommons.org/licenses/by/4.0/
- For Sale
- No
- Fulfillment Mode
- platform
- Manual Price Cents
- Not supplied
- Image Url
- https://r2-upload.3dcarparts.workers.dev/file/parts/cf540d62-b0e1-48df-9fb6-a9ec215ef150/images/center-console-light-adapter-1_1778401604570_61jj8v.jpg
- Author
- RobsonM
- Estimated Price Cents
- Not supplied
- HasMultipleModelFiles
- No
- ModelFileCount
- 0
- Download Count
- 0
- Detail Url
- https://3dcarparts.org/library/2013/Mazda/6/center-console-light-adapter
Source price fields and sale flags are metadata, not our selling prices. Their currency was not specified in the catalog. File counts do not mean files were downloaded or tested. No manufacturer savings or discontinued status is inferred.